
Upgrading speakers can make a big difference in a Porsche, but there’s another piece of the audio system that can unlock even more performance — the amplifier.
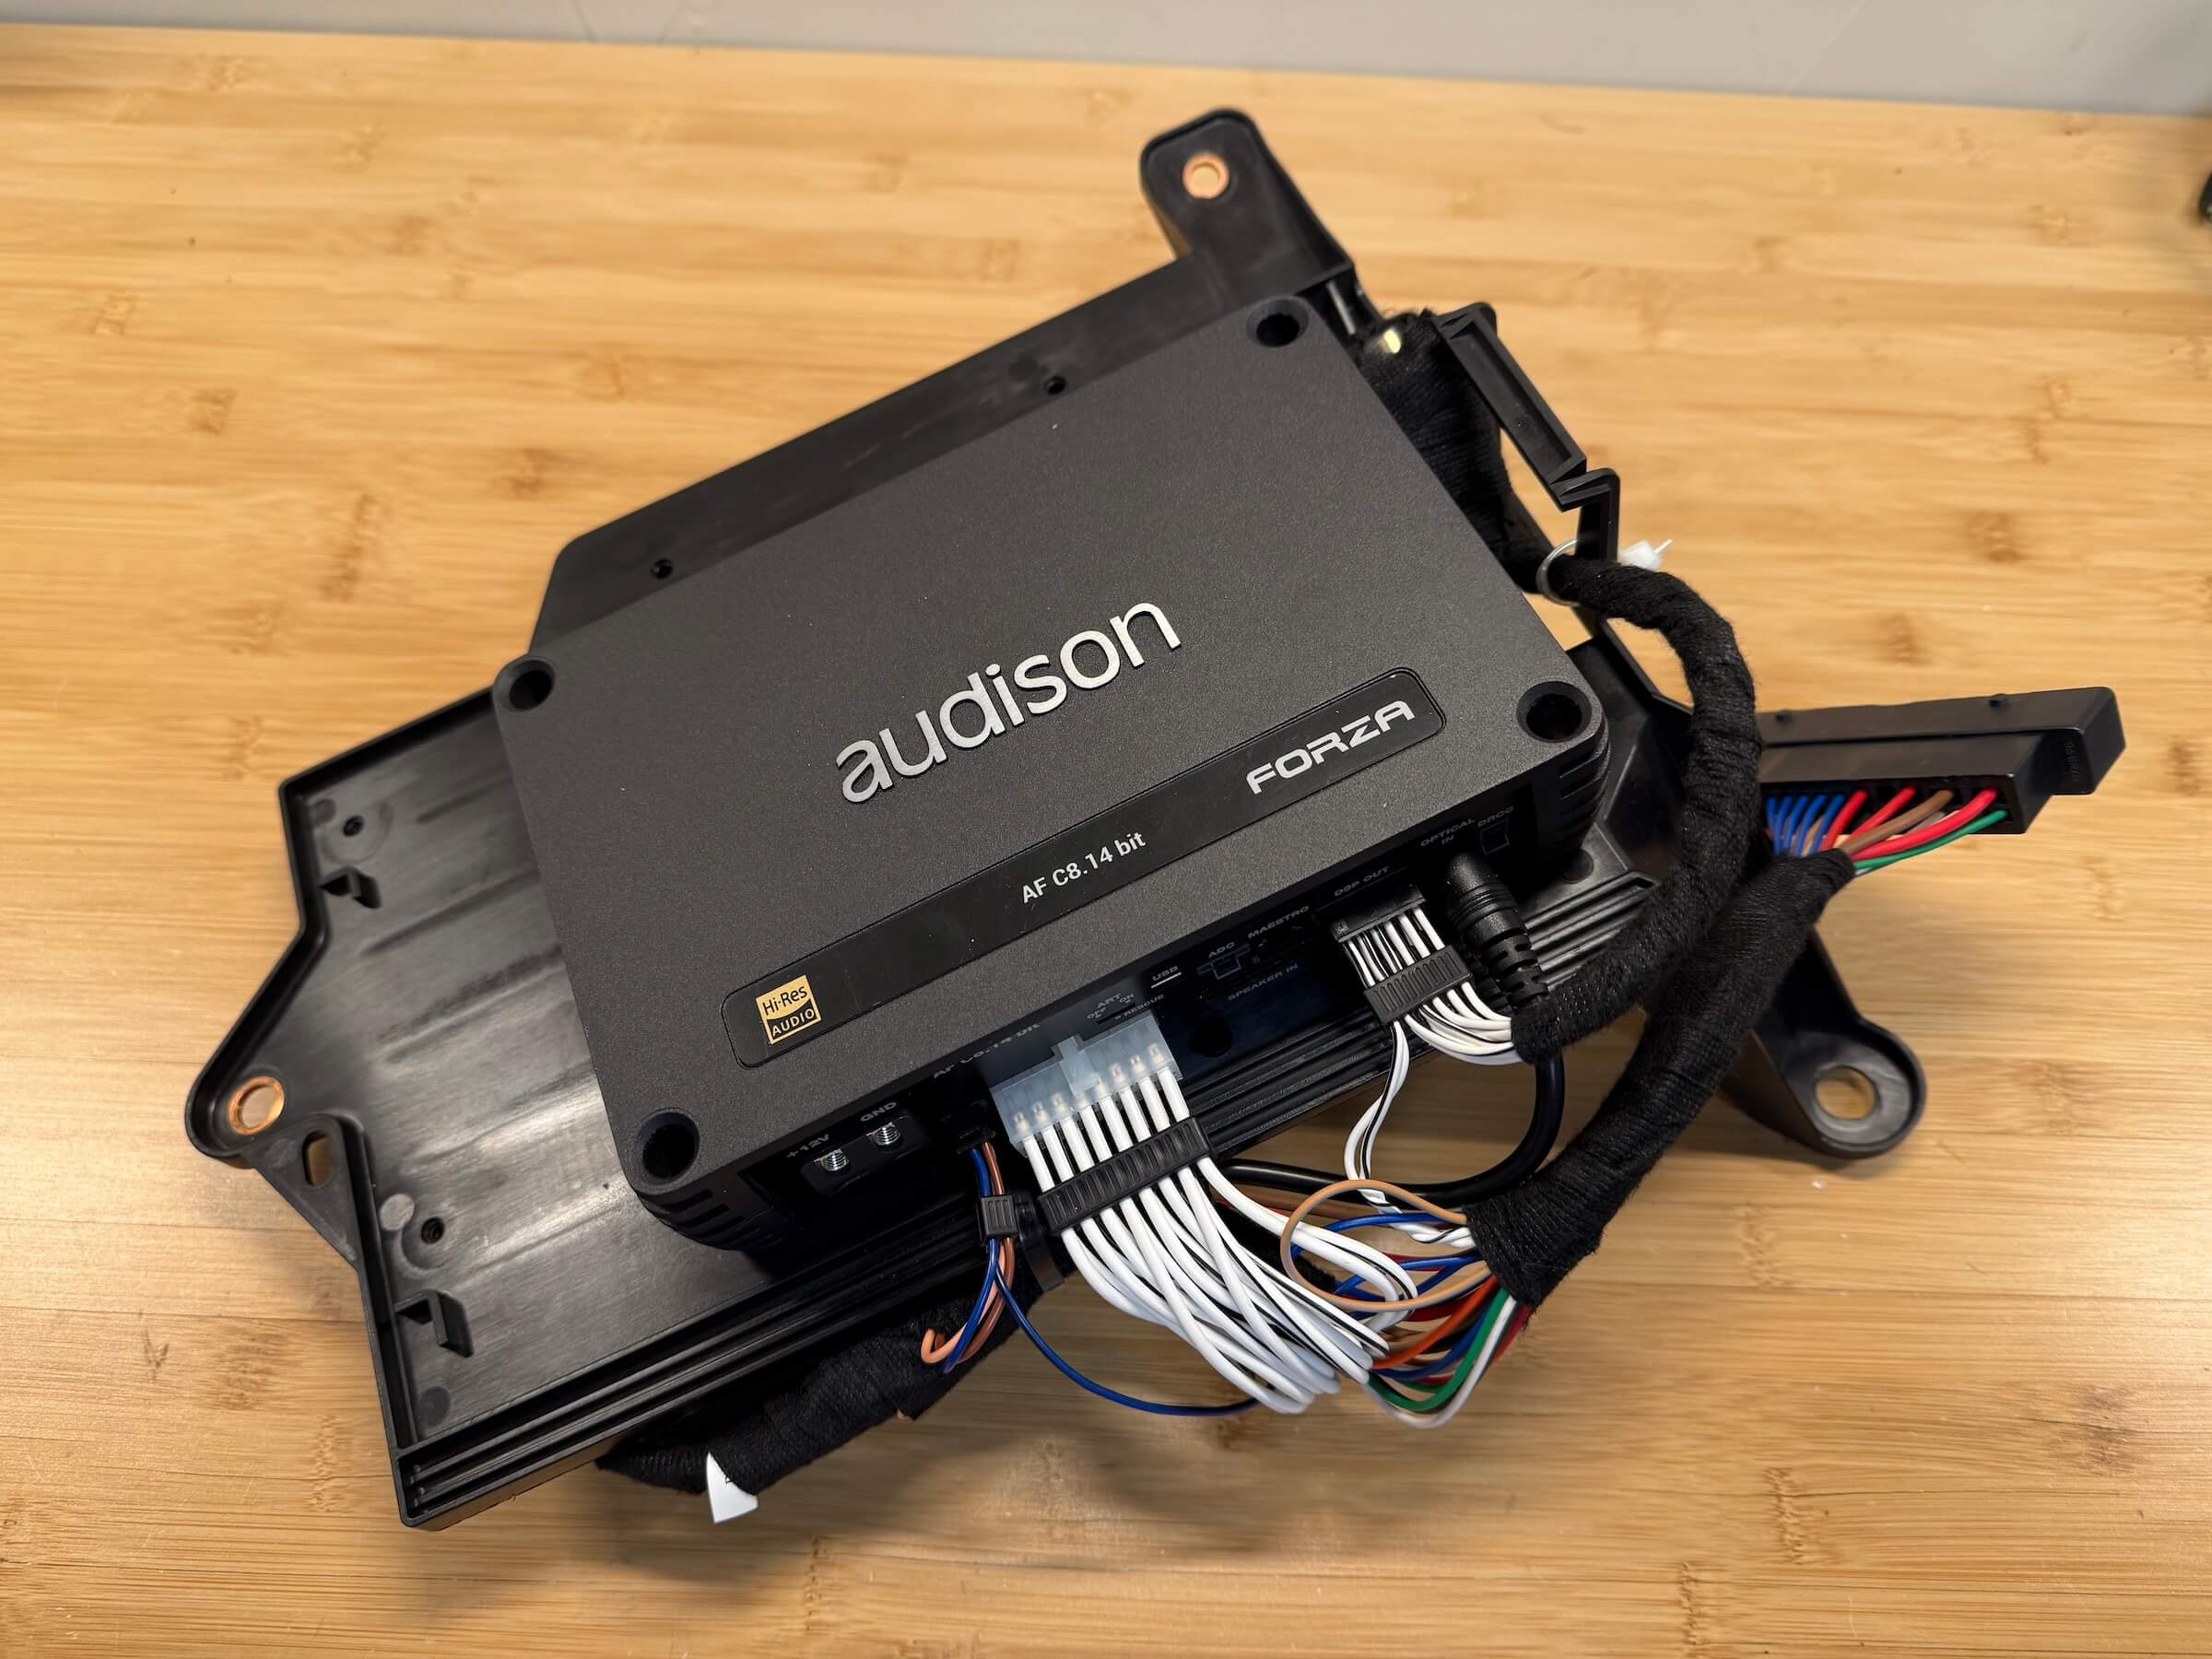
Today we’re installing an Audison Forza AF C8.14 bit DSP amplifier in a Porsche Macan. In addition to providing more power, the built-in DSP gives us much greater control over crossovers, individual speaker levels, time alignment, and equalization.
The goal here is also to keep everything as clean and factory-like as possible. No cutting up the factory wiring, no amplifier bolted randomly to the cargo floor, and no giving up valuable storage space.
Let’s dig in and see what this looks like.
Starting With the Factory Amplifier Location
The amplifier in the Macan is tucked away behind the trim in the rear cargo area, which is actually a pretty convenient location for an upgrade. It keeps the electronics completely hidden while also placing them close to the battery and the factory speaker wiring.
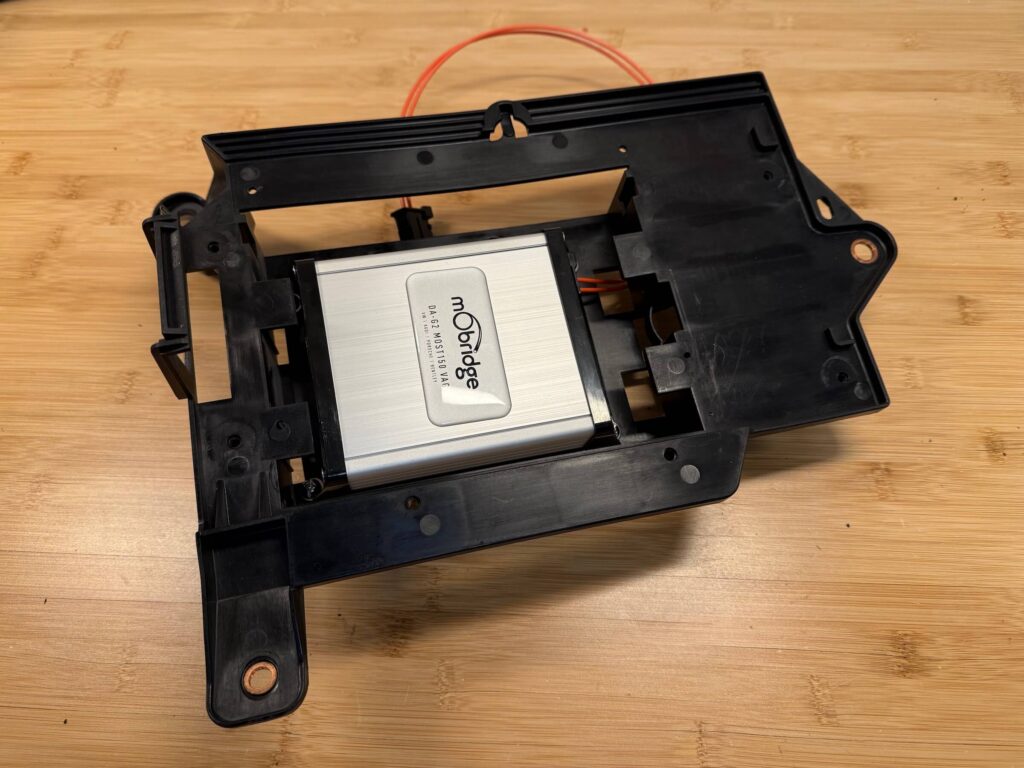
In this particular setup, a mObridge DA-G2 MOST150 adapter interface is being used to provide the connection between Porsche PCM and the Audison amplifier. The adapter can convert the factory MOST audio signal to an output suitable for an aftermarket DSP/amplifier while retaining the integration with the vehicle’s audio system.
One of the nice things about working in this location is Porsche already provides a substantial plastic carrier with factory mounting points. Rather than adding a separate amplifier rack somewhere else in the car, we can make use of the space that’s already there.
Mounting the Audison Amplifier
The Audison Forza is compact enough to fit inside the factory amplifier area, but some custom mounting is needed to get everything positioned correctly.
We drilled holes and added a set of bolts to secure the componets to the original carrier, allowing the Audison amplifier to sit securely above the MOST adapter while keeping access to the connections around the edge.
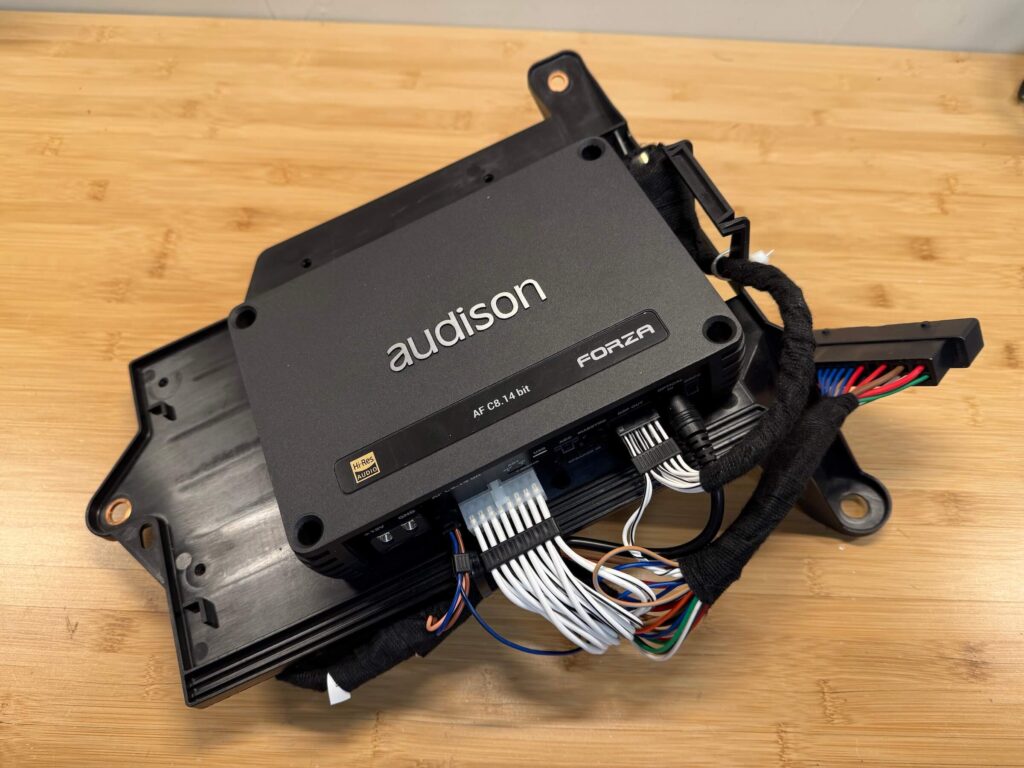
The end result is surprisingly compact considering how much hardware is packed into this area.
The amplifier and interface are both firmly secured, the original Porsche mounting points remain intact, and the entire assembly can still be installed and removed as a single unit.
Flipping everything over gives a better look at the mounting hardware.
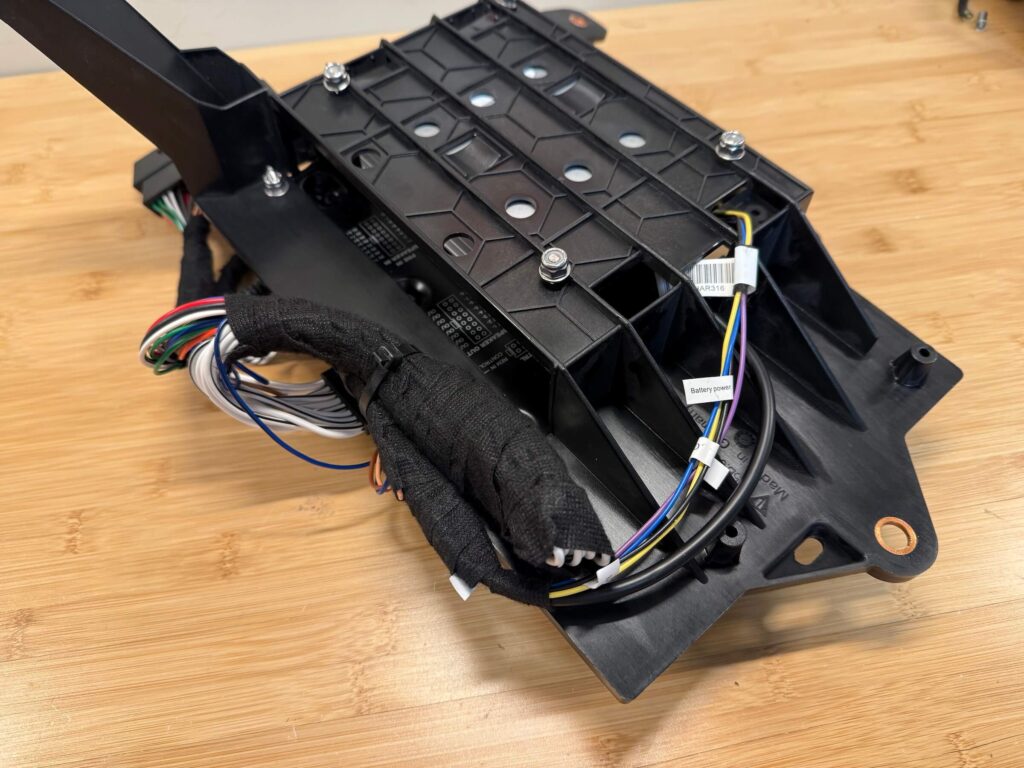
It may not be the side anyone sees once the car is back together, but a little extra time spent here helps ensure nothing moves, rubs, or starts making noise down the road.
Wiring Everything Up
With the amplifier mounted, it’s time to handle the wiring.
Our Porsche amplifier wiring adapter allows the original vehicle speaker wiring to be retained when installing an aftermarket amplifier, which avoids cutting or splicing the factory harness.
The wiring is routed around the carrier, bundled together, and wrapped with automotive cloth tape. This not only cleans up the installation but also helps prevent wires and connectors from rattling against the surrounding trim.
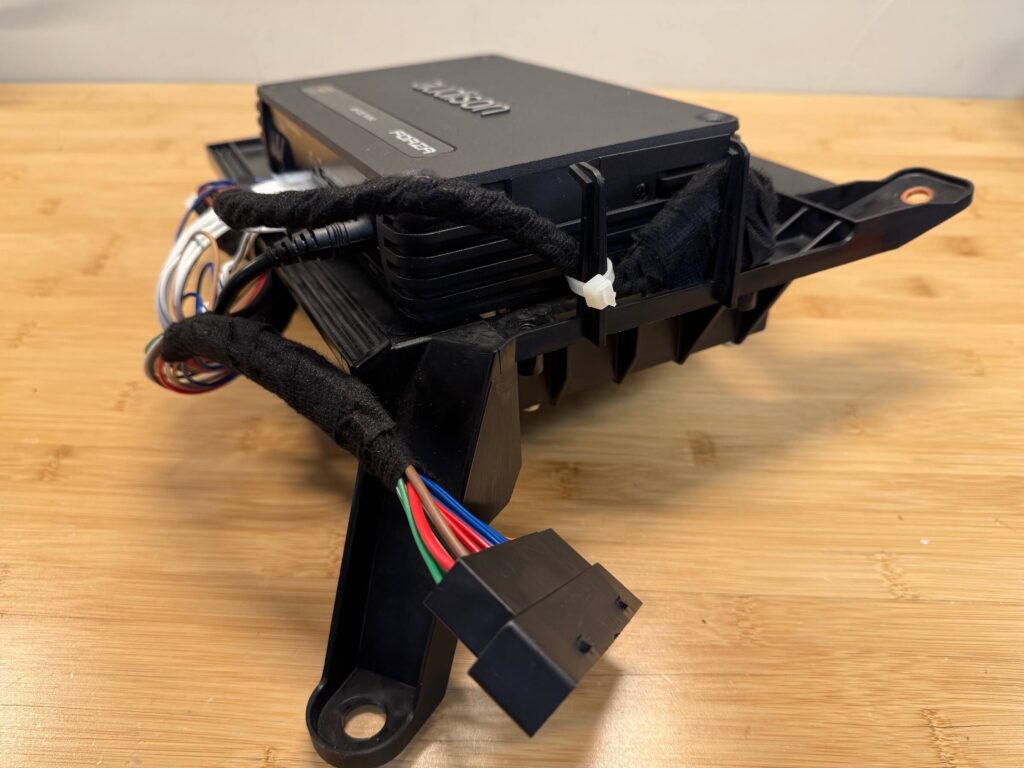
There are quite a few connections involved once you start independently controlling multiple speakers, so spending some time organizing the harness makes a big difference here.
And perhaps more importantly…it makes troubleshooting a whole lot easier if you ever need to come back later. 🙂
Adding Dedicated Amplifier Power
An aftermarket amplifier needs considerably more current than the original accessory wiring is designed to provide, so a dedicated power connection is run directly from the battery rather than relying on the factory amplifier power wiring. This is the recommended approach for aftermarket amplifier installations whether you are using the Rennspec amplifier adapter or not.
Fortunately, Porsche makes this relatively painless in the Macan because the battery is located beneath the rear cargo floor, only a short distance from the amplifier.
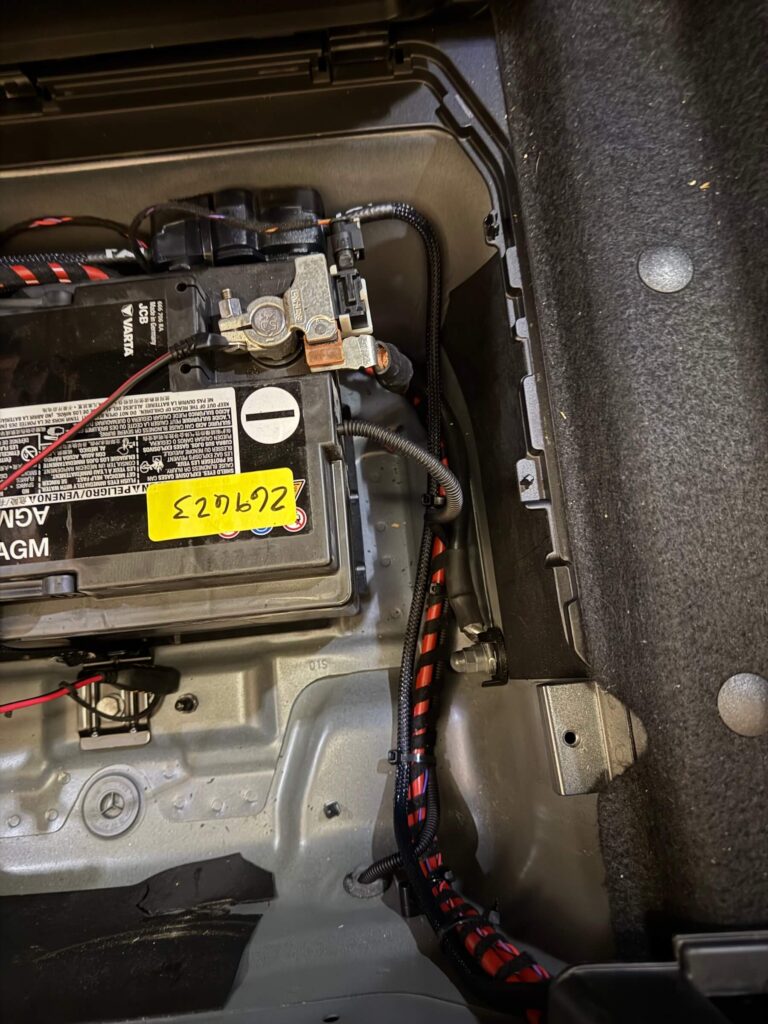
The new power cable follows the existing factory wiring path along the side of the battery compartment before continuing into the amplifier area. A ground is secured to a factory ground point just behind the amplifier.
Keeping the power run this short is a nice bonus. There’s no need to route a large cable all the way from the front of the vehicle, and virtually all of the added wiring stays hidden beneath the rear cargo trim.
Back Into the Macan
With the carrier assembled and the wiring completed, everything can be installed back into the original amplifier location.
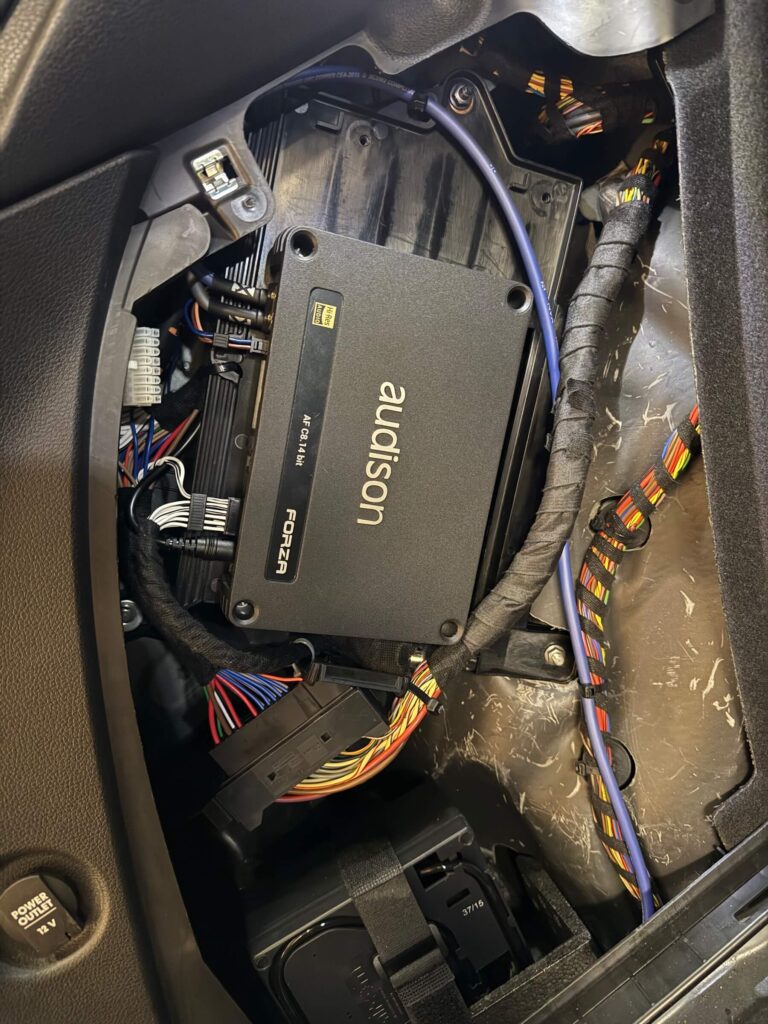
It’s a cozy fit — because Porsche apparently didn’t leave this space empty in anticipation of us installing a DSP amplifier after the car was built — but everything fits nicely without sacrificing any usable cargo space.
Once the trim panels are back in place, there’s really no indication anything has been changed.
Exactly what we’re looking for.
On to the Fun Part…Tuning!
Installing the amplifier is only half the job.
The real advantage of a DSP amplifier is the ability to control how each part of the system operates. The Audison Forza is configured using Audison’s bit Drive software, which provides control over individual channels, crossover frequencies and slopes, output levels, delay/time alignment, and equalization.
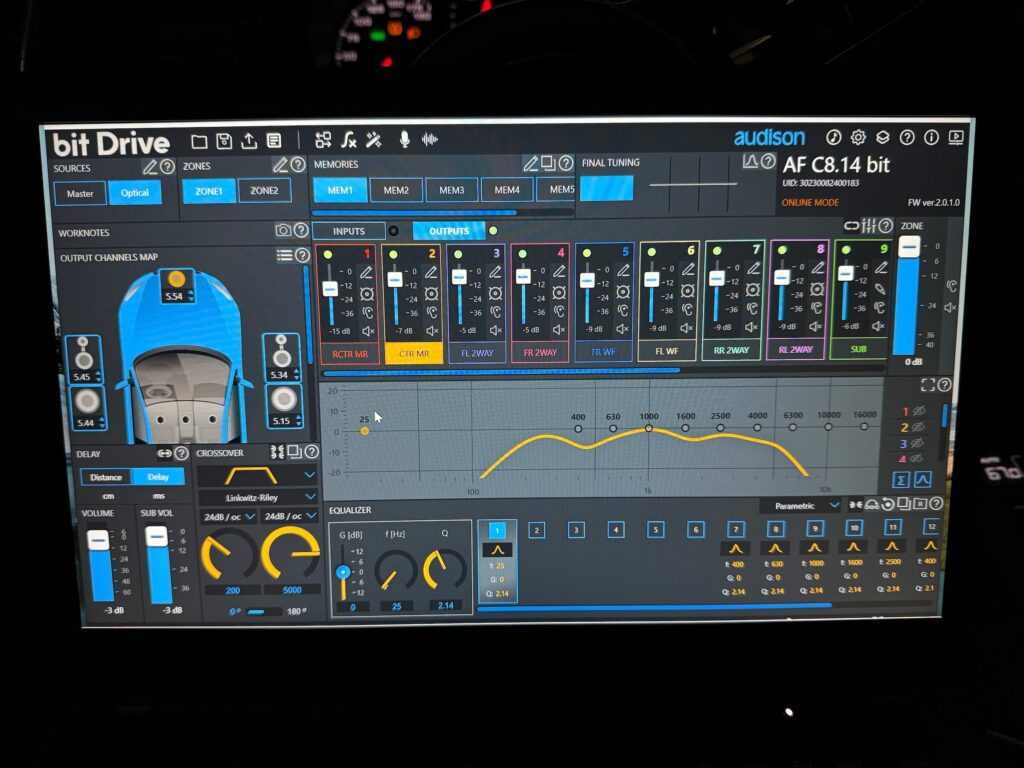
Instead of sending essentially the same signal to a group of speakers and hoping everything works well together, the DSP allows each section of the Macan’s audio system to be treated individually.
In this setup we have separate control over the front channels, front woofers, center speakers, rear channels, and subwoofer.
Audison has a series of video tutorials as well as a set of detailed user guides for getting everything set up. A few highlights of the process are shared below.
Note: As mentioned in the user guides, the initial steps of the set up process should be performed with the speaker harness disconnected from the amplifier, to avoid potential speaker damage.
Getting Started With the Configuration Wizard
Before getting into the acoustic tuning, bit Drive first walks you through a Configuration Wizard that handles most of the basic setup for the amplifier.
Think of this as telling the DSP what it’s connected to and how the audio system is laid out. The wizard guides you step-by-step through selecting the audio sources and inputs, identifying the speakers connected to each amplifier channel, and defining the overall speaker configuration. You can build the system manually or start with one of Audison’s predefined layouts and customize it from there.
The wizard can also take care of some of the more technical input setup automatically. With the appropriate Audison test tracks, bit Drive can calibrate analog input sensitivity, check input polarity and timing, and analyze factory equalization so it can be corrected before the signal reaches the DSP’s output tuning stage. These steps can also be skipped when they aren’t needed and adjusted manually later.
Next, you tell bit Drive what type of speaker is connected to each output — front woofers, tweeters, center channels, rear speakers, subwoofer, and so on. The software also supports bridged channels and can even load recommended crossover settings automatically when compatible Audison or Hertz speakers are selected.
The important takeaway is that you don’t start with a blank screen and dozens of mysterious DSP settings. The Configuration Wizard gets the fundamental routing and speaker setup in place first, and everything can still be changed manually afterward without having to run the wizard again.
Once that’s finished, we’re ready for the really interesting part — using a measurement microphone to let bit Drive automatically tune the system for the Macan’s interior.
ACCORDO Automatic Tuning
One of the best features of Audison’s bit Drive software is its automatic ACCORDO tuning capability.
Pair the software with a calibrated USB measurement microphone, such as the popular miniDSP UMIK-1, place the microphone at the listening position, and bit Drive can measure how the audio system actually performs inside the vehicle.
The UMIK-1 is particularly convenient because each microphone has its own calibration file. This allows the software to account for the microphone’s individual response and get a more accurate picture of what is happening inside the cabin.
From there, bit Drive plays test signals through the speakers and uses the measurements to help automatically configure and optimize the system.
In other words, you don’t need to be an audio engineer to get a very good starting point.
The software can do much of the tedious measurement and adjustment work automatically, and the resulting tune can then be listened to and fine-tuned to taste.
This dramatically simplifies what would otherwise be a fairly complicated process.
For many DIY installations, you could stop here and end up with a system that is already substantially better optimized for the vehicle.
For those interested in what bit Drive is actually adjusting behind the scenes, here’s a quick overview.
Level Matching
First comes adjusting the output level of each channel.
This is especially important in a system with speakers positioned all around the cabin. The center channel is much closer to the listener than some of the door speakers, for example, so simply running every channel at the same output level won’t necessarily create a balanced soundstage.
Individual channel adjustment allows everything to blend together instead of having one speaker call attention to itself.
Time Alignment
Then there’s time alignment.
Unless you happen to drive your Macan while sitting directly in the middle of the vehicle — which we don’t recommend — every speaker is a different distance from your ears.
The DSP allows small amounts of delay to be added to individual channels so sound from the different speakers reaches the listening position at approximately the same time.
When properly dialed in, vocals and instruments become much more precisely positioned across the dashboard instead of sounding like they’re coming from whichever speaker happens to be closest.
Equalization
Finally, equalization can be used to smooth out the remaining peaks and dips created by the vehicle interior.
Cars are difficult acoustic environments. Glass, seats, carpeting, door panels, and the physical location of the speakers all affect the final frequency response.
DSP gives us the ability to make relatively small, targeted adjustments instead of relying on the simple bass and treble controls available through the factory system.
The Result
This is the kind of upgrade we really like.
From the outside, nothing has changed. The factory PCM and vehicle controls continue to provide the normal driving experience, the amplifier is completely hidden in the original electronics compartment, and the Porsche wiring remains intact.
But behind the scenes, the audio system is now far more configurable.
The combination of an aftermarket DSP amplifier, a clean factory audio interface, dedicated power wiring, and proper tuning provides a much better foundation for getting the most from upgraded speakers — or even improving the performance of the speakers already installed.
And unlike changing speakers alone, the DSP gives you the ability to tailor the system specifically to the vehicle and listening position.
More power is nice.
More control is even better.
Thanks for following along. Happy upgrading!