

Today we’re looking at the process for upgrading the original Bose speakers to the much higher-end Burmester speakers.
This is a follow-up from our driver comparison where we compared the physical and electrical differences between each speaker level Porsche offers.
The Burmester speakers are the same form factor as Bose (with the exception of the dash tweeters) so performing the upgrade is fairly straightforward – especially when using our plug-and-play Bose to Burmester wiring adapters.
Let’s dig in and see what this looks like.
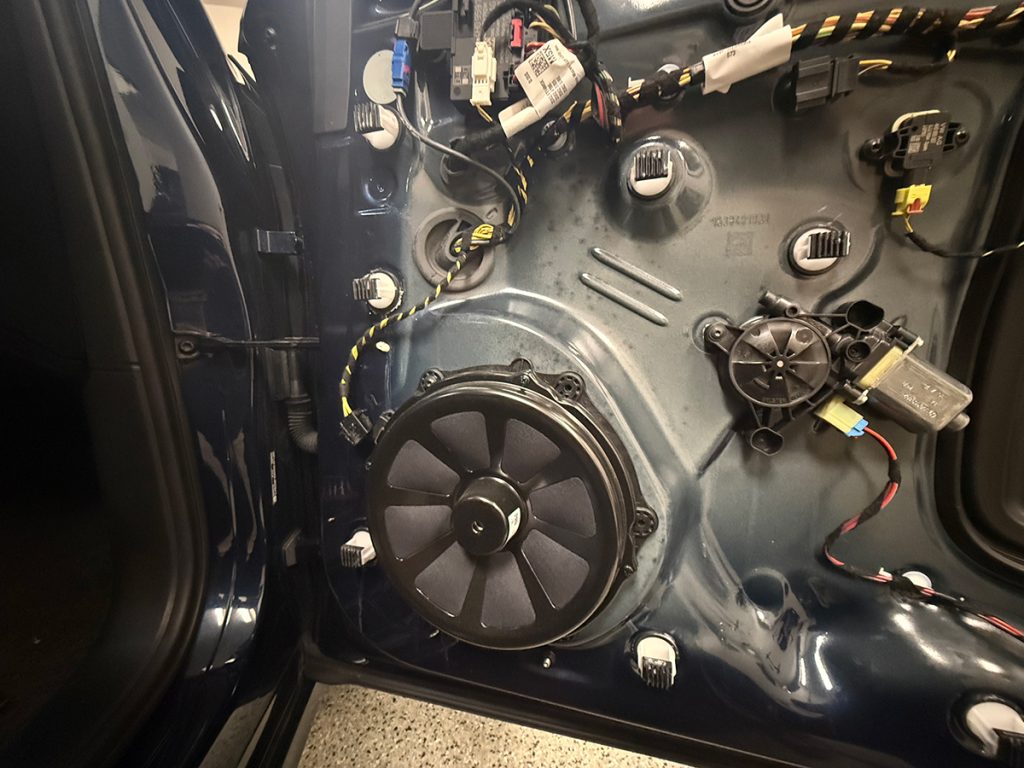
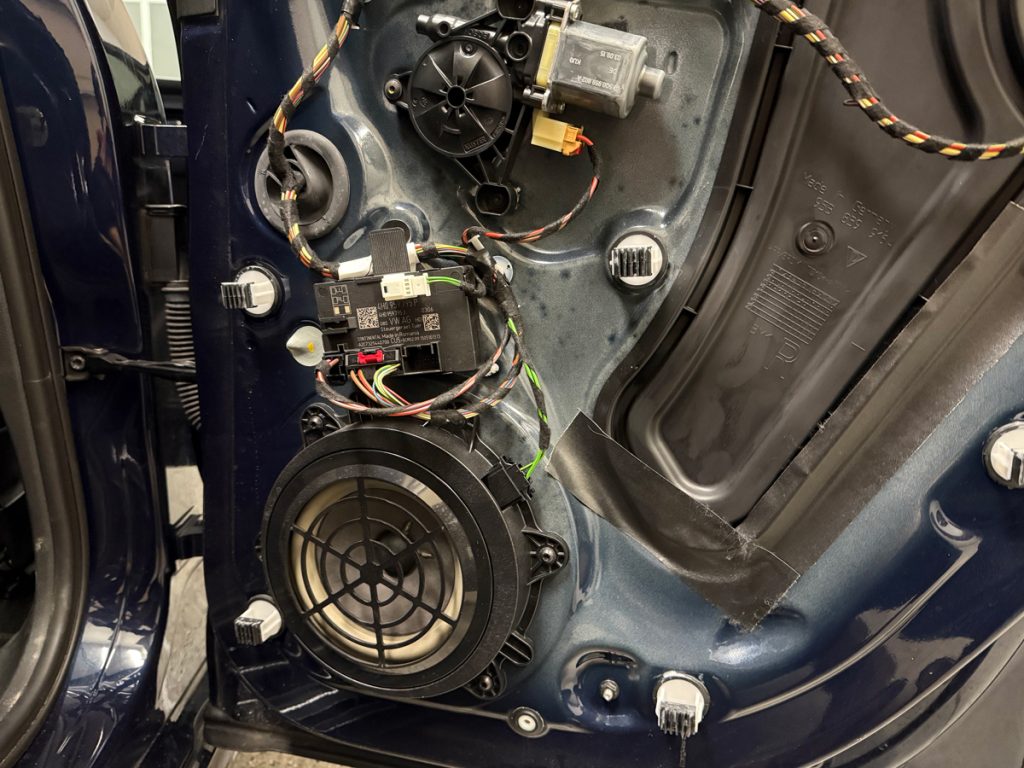
Front Door
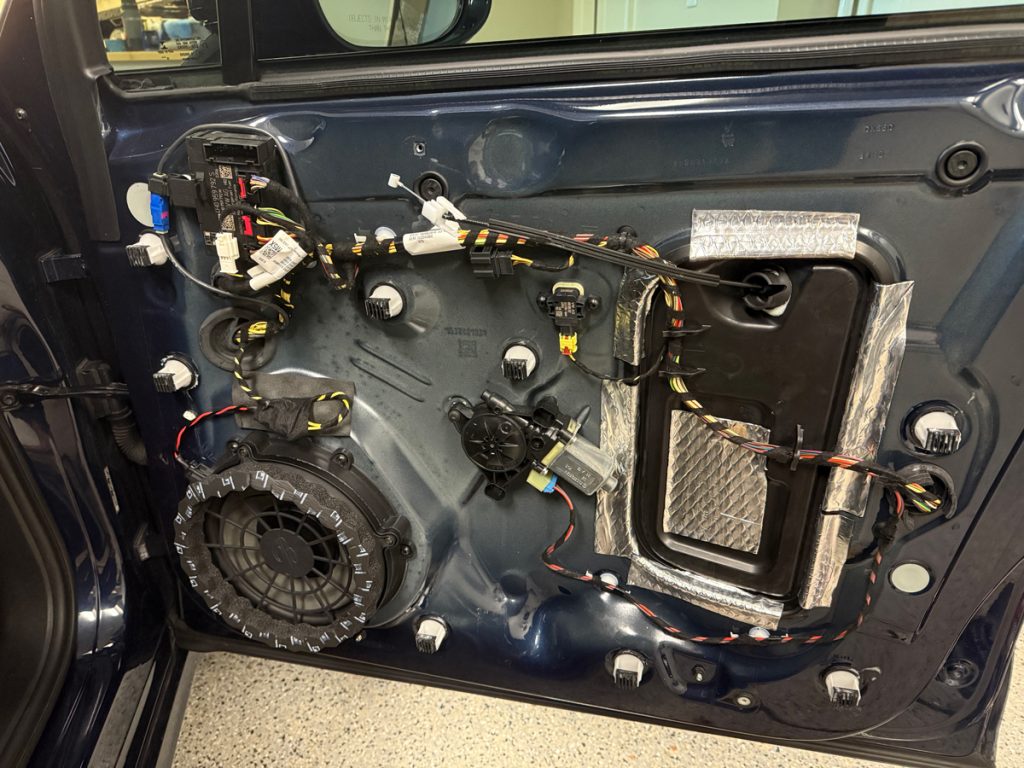
We’re starting with the front door woofers. Removing the panels is fairly straightforward, and in the Macan entails popping off the upper trim (carbon fiber in this case), the lower light housing, and smooth black plastic piece behind the door latch – then removing the 3 bolts. The panel then lifts off and you can disconnect 2 wire harnesses and the door handle cable.
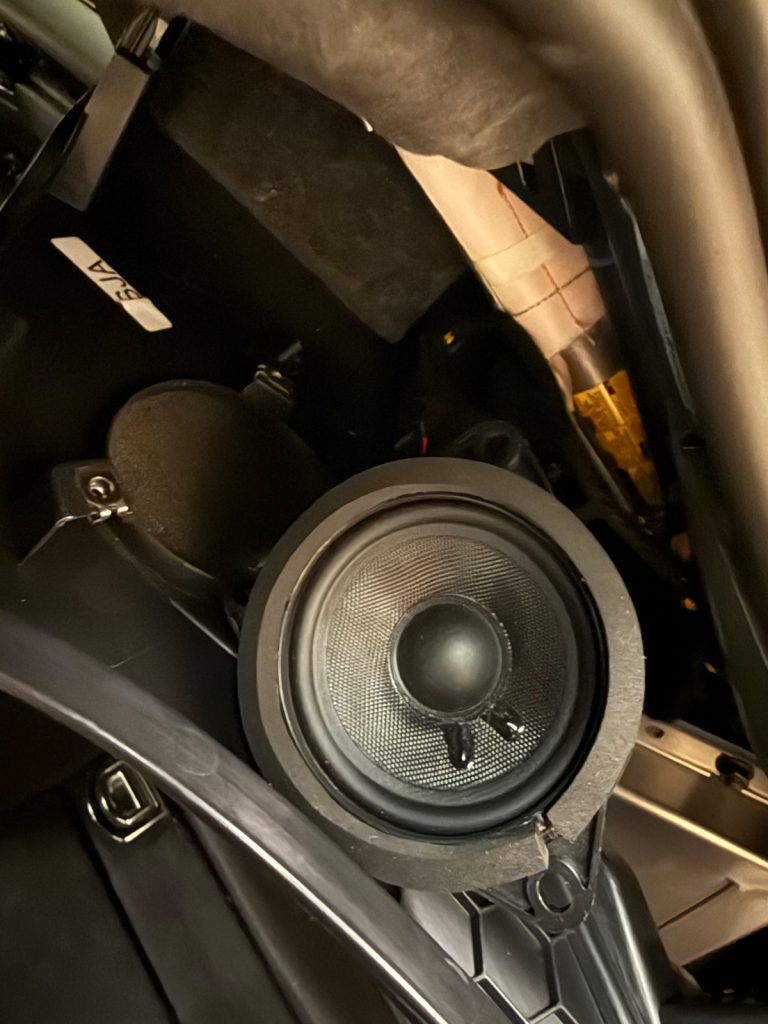
Once removed, there is clear access to the stock Bose woofer.
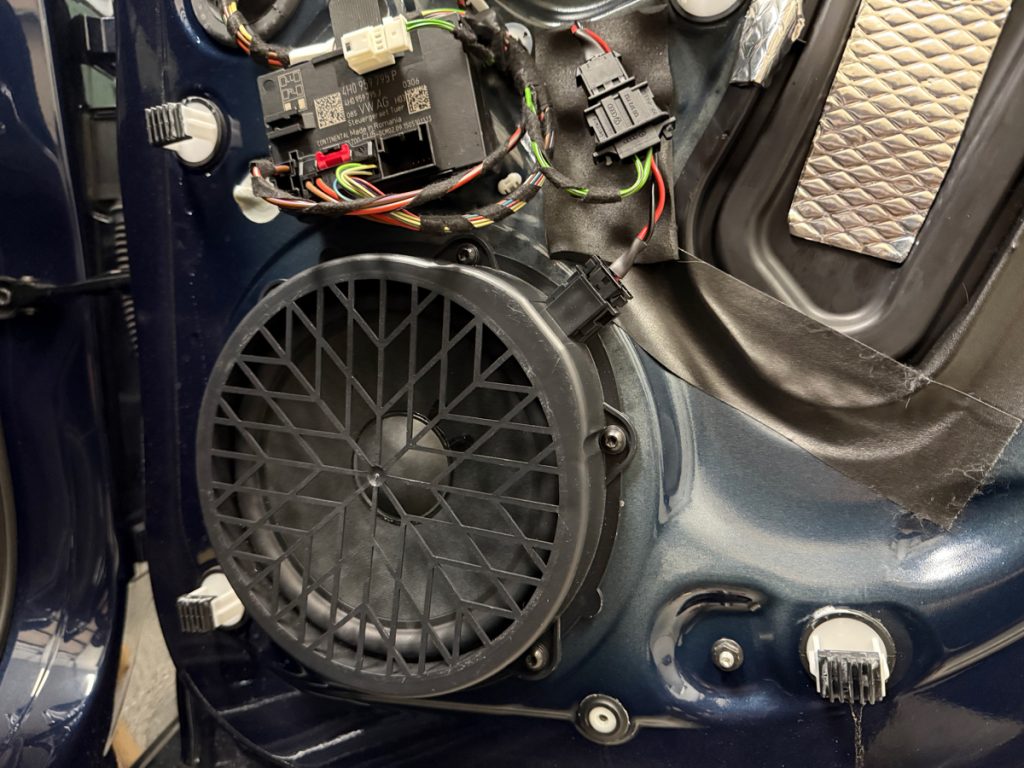
With just a few bolts, the Bose unit is removed and replaced with Burmester. The Bose to Burmester woofer wiring adapters provide a clean plug-and-play installation.
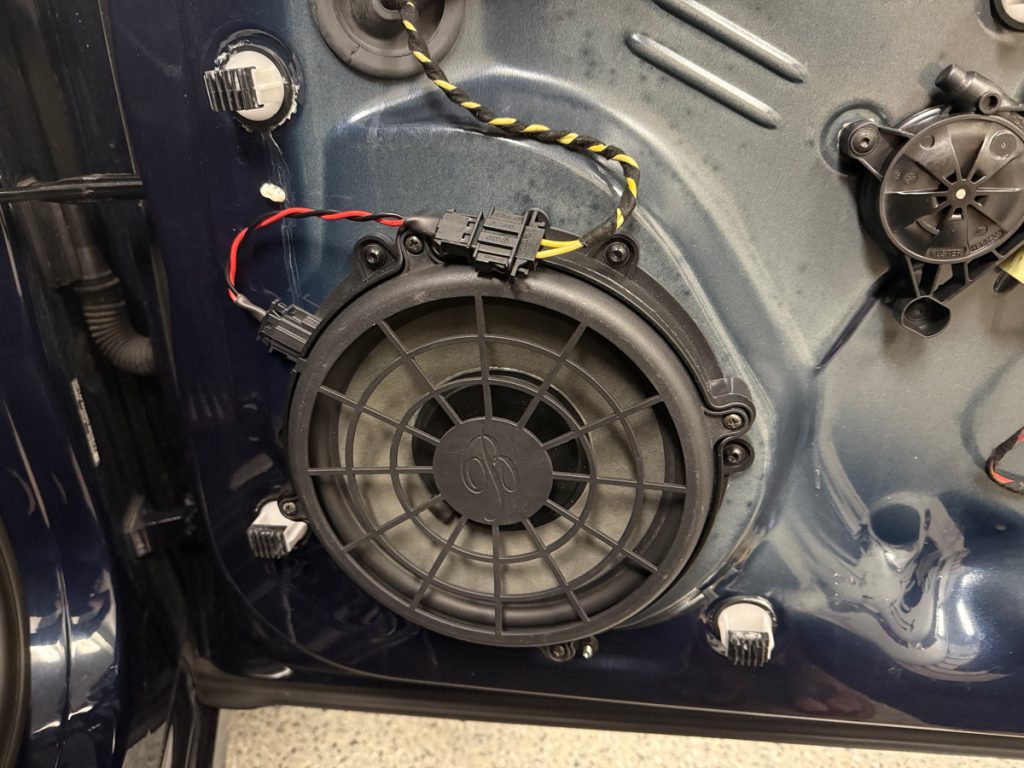
While the door is apart it makes some sense to add a bit of sound dampening to avoid any potential issues. In the case of the Macan, there is a fair amount of noise coming from the edges where the rectangular plastic insert connects with the metal door panel. Adding some Noico butyl sound deadening material eliminated virtually all of this. The wire connectors were secured with fabric tape with a small amount of foam behind.
Soundskins foam rings were added around the leading edge of the speaker itself. The goal is to direct the sound out towards the grill, and limits the sound going sideways which can resonate the door panel. It also helps reduce any door panel vibrations direction in front of the speaker.
Front Door Midrange
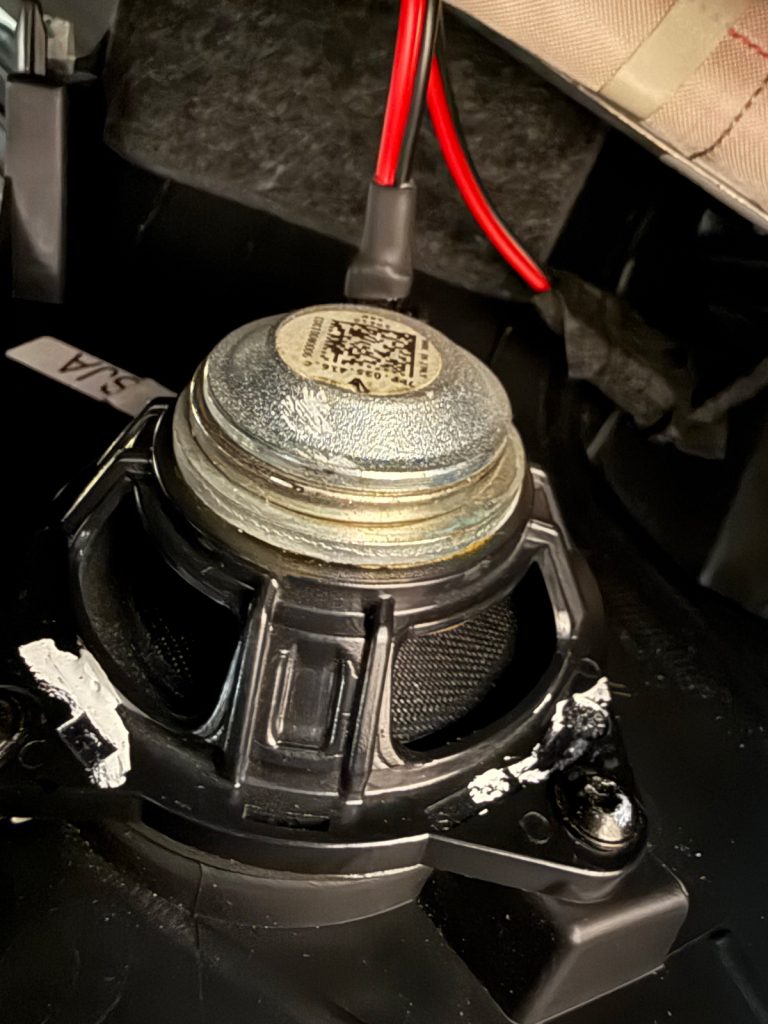
The front midrange speaker is attached to the door trim itself. There are 2 bolts here and the new Burmester mid is secured into place. Like the woofers, the Bose to Burmester midrange wiring adapters were also wrapped in cloth tape and secured.
Rear Door Woofers
On to the rear! These are mounted in a similar fashion as the front woofer and Porsche has thoughtfully added some black tape at the factory to reduce some of the noise from the black plastic panel. It’s interesting they have this here but not in front. 🤔
A few bolts and the Burmester woofer is in place and the wiring connected with the Bose to Burmester woofer wiring adapters.
Just like the front some sound deadening was added to ensure things stay rattle-free.

Rear Door Tweeters
The rear door tweeters use the round Burmester tweeters, which have the same case size as Bose. However, the actual driver inside the Burmester tweeter is about 25% larger. When installing these, be sure to make the wiring connections before snapping the tweeters into place as it can get a little cozy.
Since this is a 2016, the tweeter is wired on the same channel as the rear door woofer, so we are using the Bose to Burmester tweeter wiring adapters with Mundorf crossover to ensure the lower frequencies are filtered out before reaching the tweeter.
Once the tweeter is in place the wiring harness and crossover are secured to the backside of the door panel to avoid any rattling.
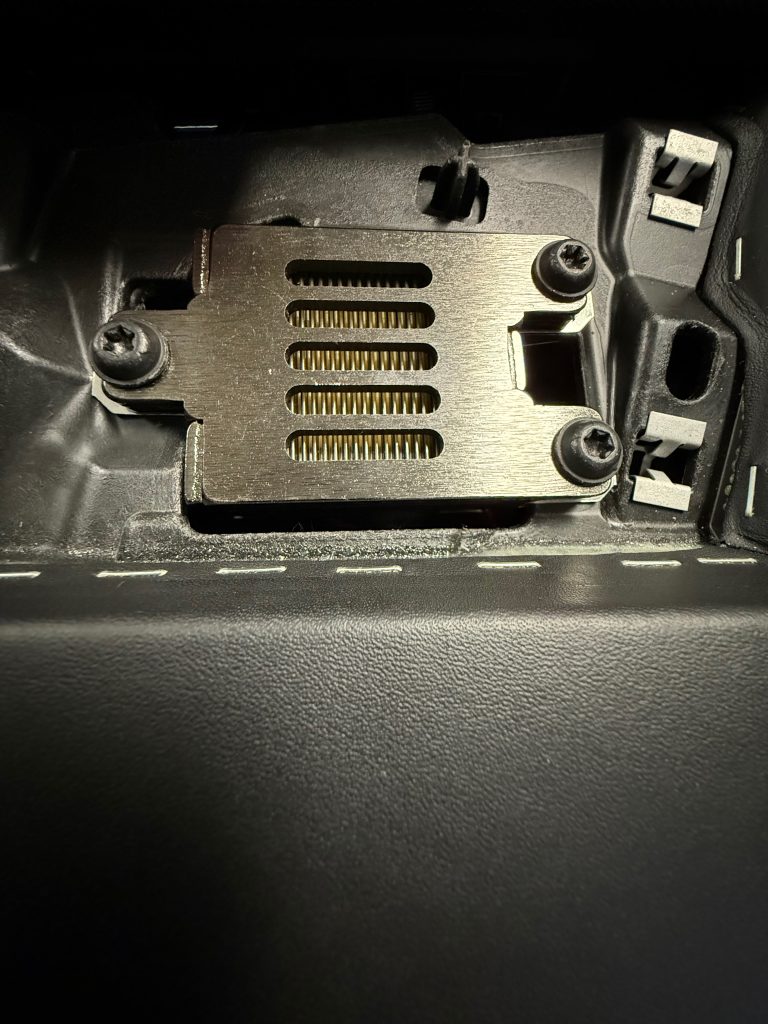
Front Dash Tweeters
On to the fun part…front tweeters!
Installing these requires a permanent modification to the dashboard frame. If this isn’t your cup of tea the same round Burmester tweeters installed in the rear can be used here, which will be a drop in replacement for the Bose (or Base) tweeters.
But this is a full-on Burmester upgrade…so it’s time to get cutting!
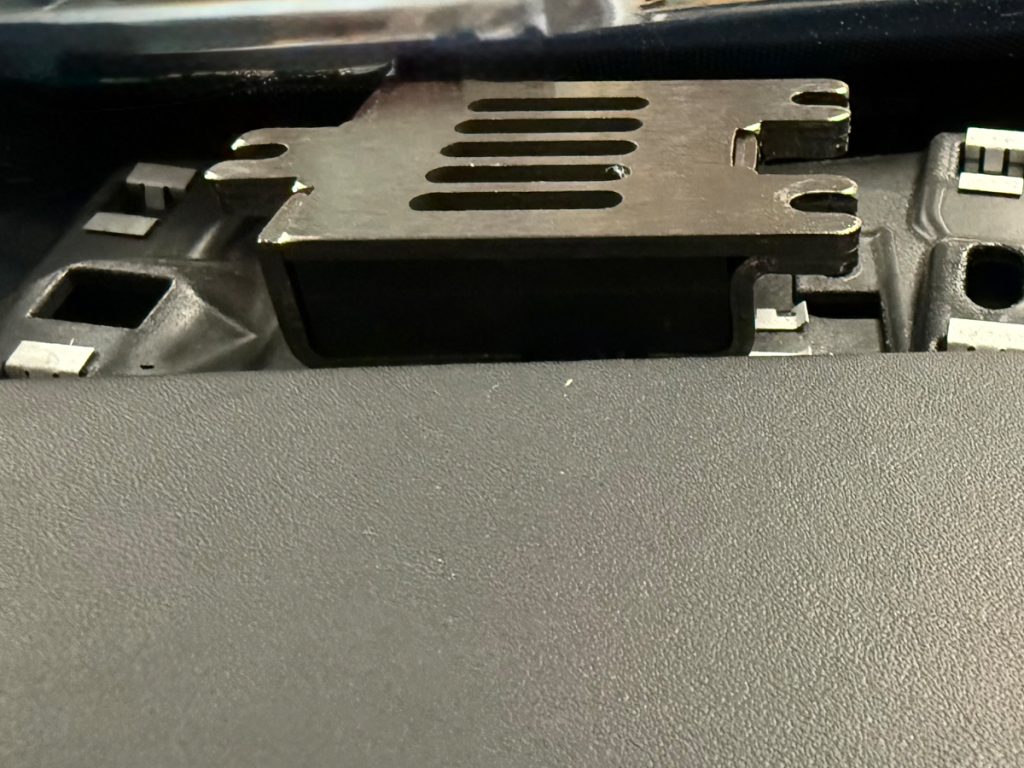
From the factory, cars with Bose have an extra plastic insert which cars with Burmester do not have.
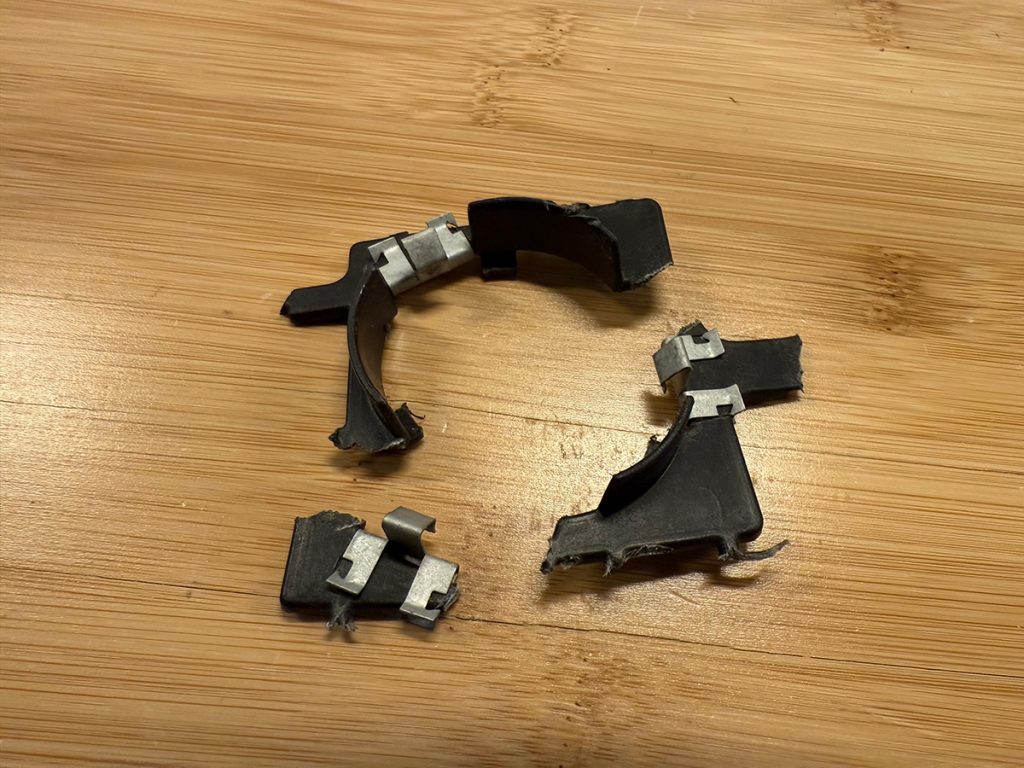
The insert is secured in place with small tabs which can be cut with a utility knife for a clean install. After a bit of trial and error, the easiest method for removal was to use a sharp utility knife and cut the tabs on the forward side. Once this was done, the insert can be pushed downward to break the remaining tabs.
It’s ok if the insert comes out in multiple pieces, as it is no longer needed.
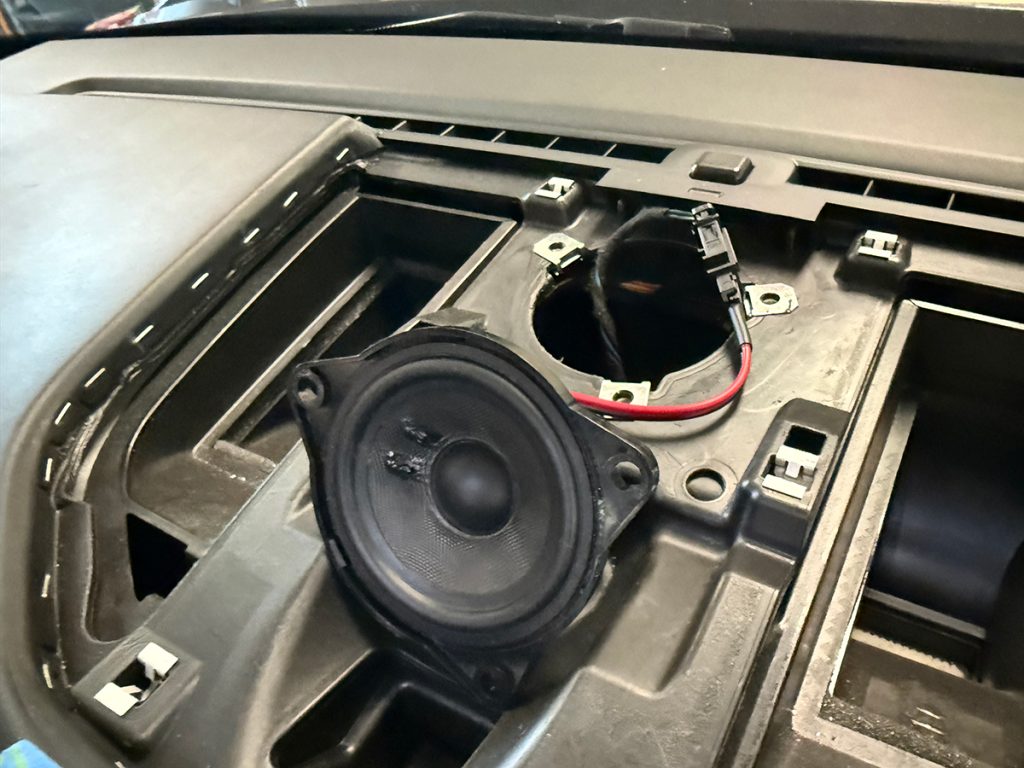
With the insert removed we are left with a hole perfectly sized for the Burmester AMT tweeter.
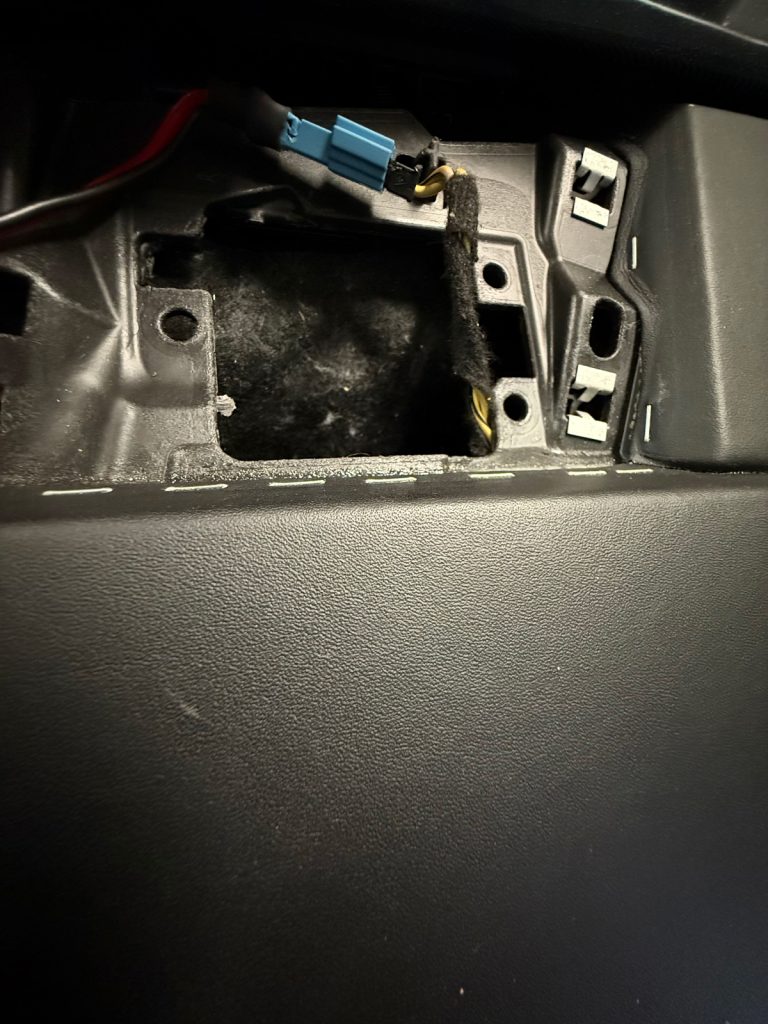
Time to connect the wiring and wrap things in tape to avoid rattles. Like the rear, the front tweeters are wired on the same channel as the front midrange speakers, so we are using the Bose to Burmester tweeter wiring adapters with Mundorf crossover to filter out low frequencies.
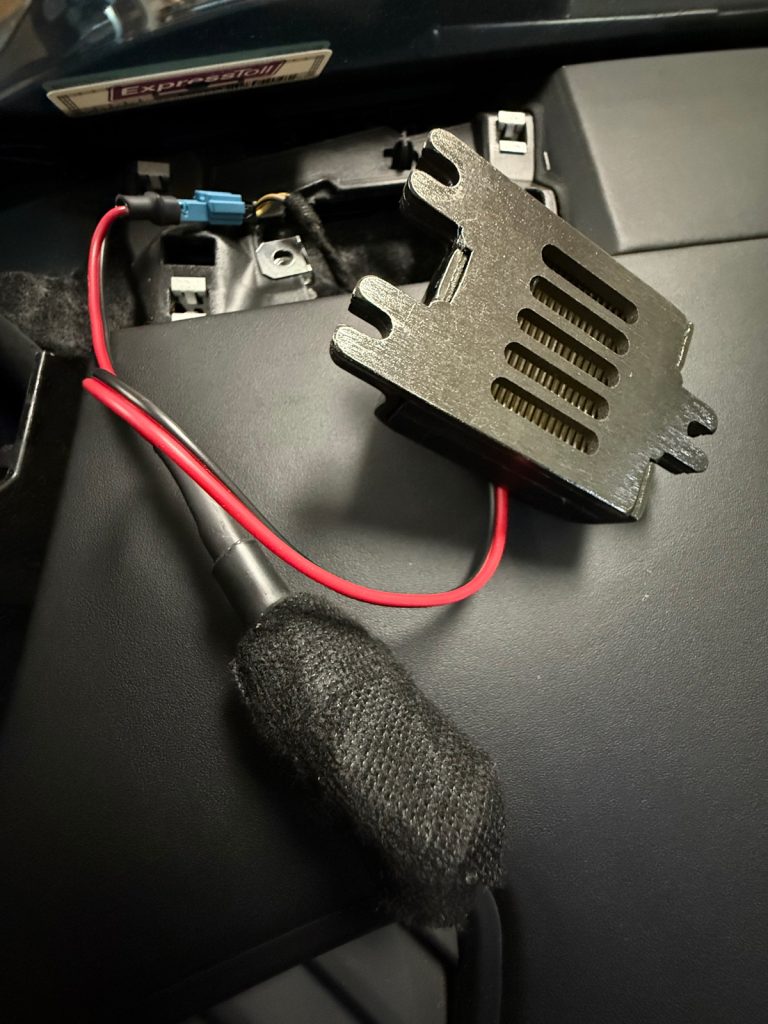
The tweeter is then secured using OEM speed clips and bolts. Just like it came from the factory! 🤩
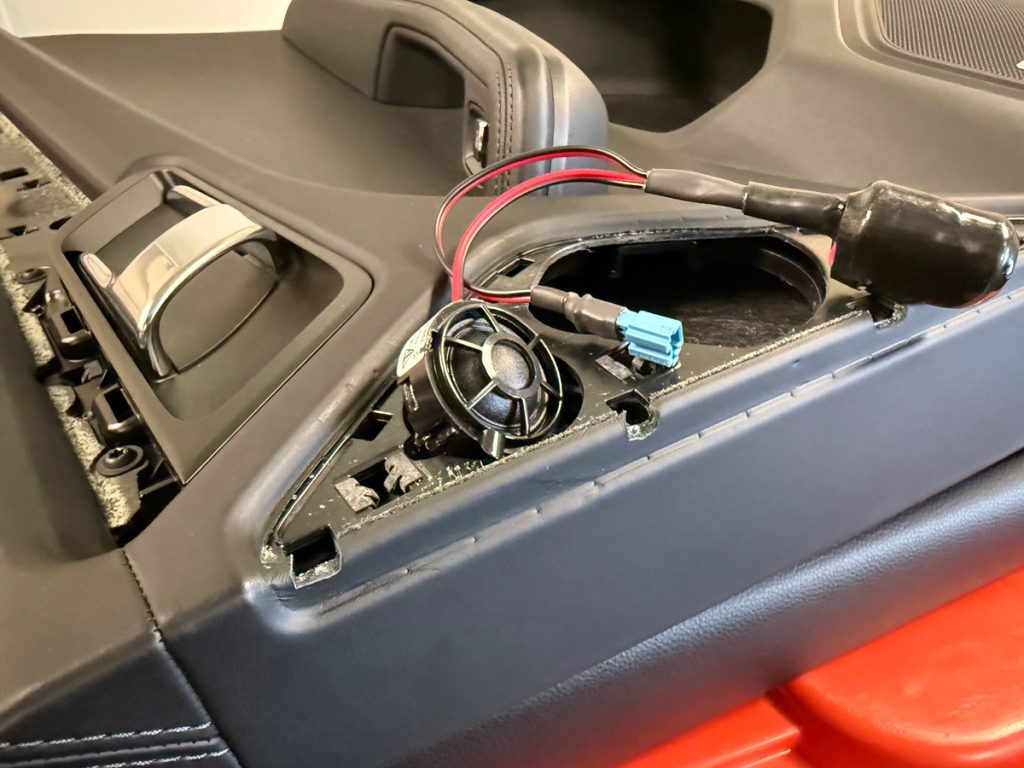
Front Dashboard Center
While we’re up front, we can swap the center as well. To access this on the Macan, simply push back on the clock face while gently prying the front edge of the trim (if you have a leather dash you may consider using blue painters tap to avoid any scuffs) and the cover comes right off.
Note: Once the cover is lifted about an inch up, there are 2 vertical tabs you need to press outward so the cover can be fully removed.
Rear Subwoofer
We’re getting close to the end, and what’s left…oh yes the Burmester sub!
The Bose and Burmester subwoofers have similar form factors, but the box material is very different. The Bose is made from rather thin plastic which echos quite a bit when tapped on. The Burmester enclosure is much heavier and molded from much denser plastic material. Weight-wise, the Burmester is nearly twice as heavy!
Note: This picture shows the Burmester subwoofer (bottom) and newer Bose subwoofer (top) and which does not include an external amplifier. On the 2016 the Bose sub does feature an external amplifier – albeit a less powerful one (200 watts compared to 300 watts for Burmester).
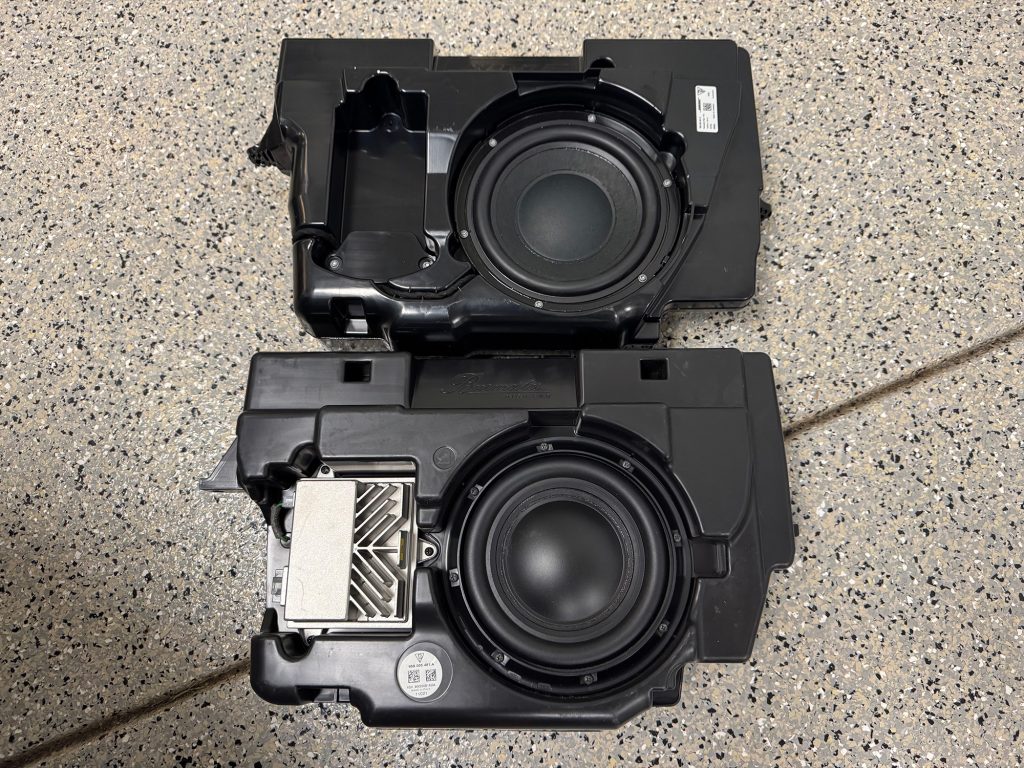
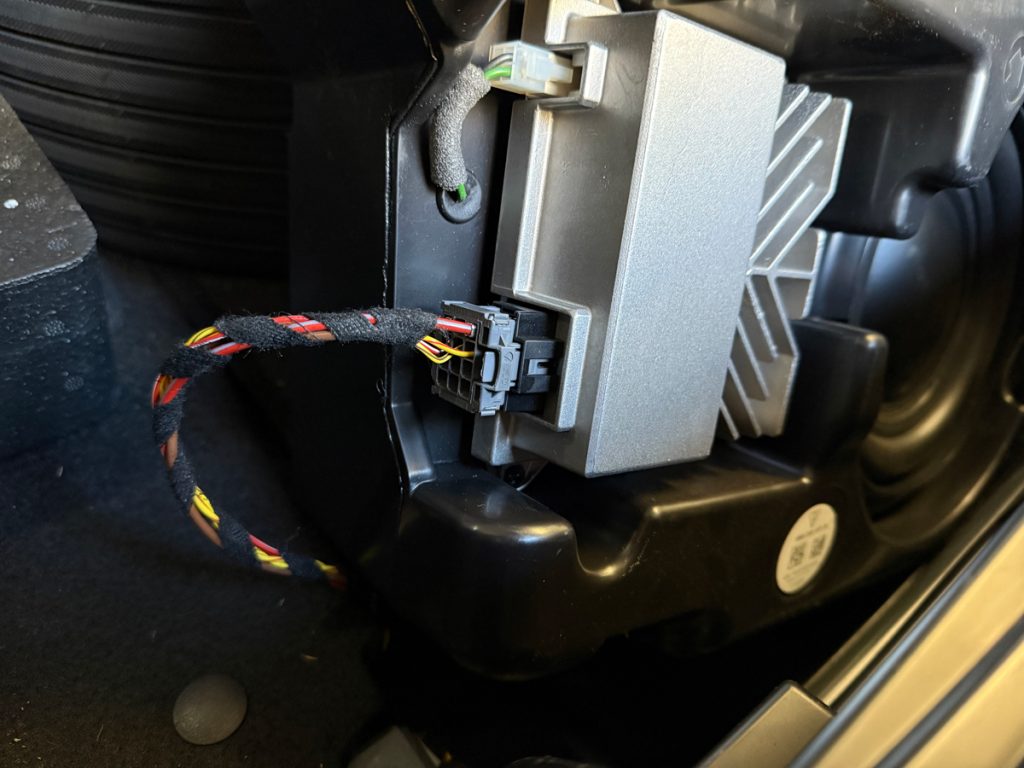
The Bose and Burmester amp connections are different and we were able to source the correct connector for the Burmester amp. After pulling the fuse (25amp fuse 5C in the right rear area) the new connector was attached and snapped right into the more powerful Burmester amp before securing the enclose into the factory location.
Note: Directly in front of where the subwoofer fires (towards the rear of the car) there is a piece of plastic trim which is a bit floppy. This was causing some rattling even with the previous Bose sub, and adding a small amount of foam between the panel and the metal body fully eliminated this.
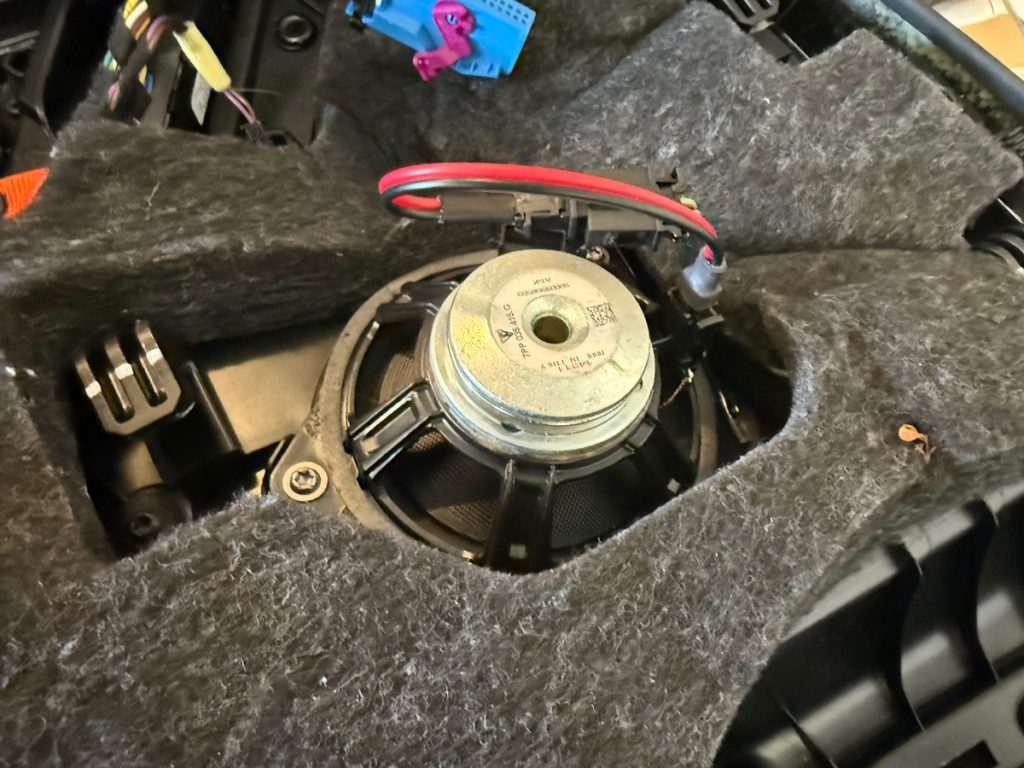
Rear Midrange Surround
Just 2 speakers left to go…though these may be the most challening.
Removing the rear D Pillar trim in the Macan requires a fair amount of patience, and this post on MacanForum has a good overview of what this looks like.
After removing the Bose drivers, a bit of neoprene foam was added to the new Burmester drivers before securing them in place. Like other areas, the wire and connectors were wrapped and secured with cloth tape.
Note: On the 2015-2016 Macan the two surround speakers are wired on a single channel, and the driver’s side speaker is wired with reverse polarity by design. In our case it was decided both speakers should be wired with correct polarity, so the driver’s side wiring was reversed.
Verdict
Was the upgrade worth it? Yes, most definitely!
The front sound stage with mids and tweeters are substantially more clear and crisp. It could be described as a fog being lifted and details that would be muffled or hidden before are now clearly heard.
The bass feels smoother and incredibly more rich and full. This is a big departure from the boomy bass but hollow bass that the stock Bose system exhibited.
The Burmester speakers seem to handle whatever power the stock Bose amp can throw at them, so volume-wise it’s possible to go much louder than before without dealing with the distortion issues that the previous Bose drivers started to exhibit at around 50% volume.
Overall, this is a fantastic upgrade option for those not looking to make dramatic changes to the car or spend the extra money for an aftermarket amplifier. Between using speakers with the same form factor combined with plug-and-play wiring Bose to Burmester upgrade wiring harnesses the installation is relatively straightforward, and can be completed in just a few hours with normal hand tools.
Sites like GetPorscheSilverSpringParts.com can be used to look up vehicle-specific part numbers and to purchase replacement Burmester drivers. Also, we often have gently used Burmester speakers listed on eBay which can make this an even more cost-effective upgrade.
Thanks for following along. Happy upgrading!